USING LOGIT (WEB) – INCIDENTS
HOW TO MANAGE INCIDENTS
When you are inside an active log, click on the Incident tab.
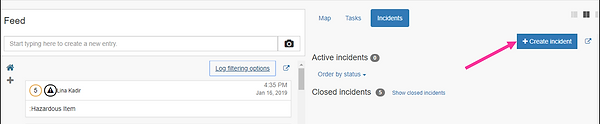
When there are no active incidents, you will see a button to create new incidents, as well as two sections for active and closed incidents.
CREATE AN INCIDENT
Click on the "+ Create incident" button to add an incident.
You will see a list of the different incident types that are available. Your administrator can adjust the types of incidents that fits your organization.
Choose which type of incident you want to create. The severity level of the incident is predefined, but you can change to another level if needed.
If you want to, you can change the name or title of the incident, before you click "Create".
MANAGE AND VIEW ACTIVE INCIDENTS
The incident tab gives you a great overview of all active incidents. Each incident has their own "card" where you can both see the updated status, and also make adjustments to the incident.
Each incident card provides the following information:
(The numbers on the image corresponds with the explanation below)
1. ID number and severity level
The incidents are given a number, starting from 1. The colour that outlines the number indicates the severity level that has been set for the incident. The severity level can be changed by choosing "Edit incident".
2. Incident type
The icon indicates what type of incident this is. The icons being used can be set by your administrator.
3. Location of the incident
A red icon indicates that the location of the incident has not been set. A green icon means that a location is set. The incident will be marked on the map when activating the map view.
4. Teams
The number shows the number of teams that have been assigned to the specific incident. Click on the team icon to view assigned teams, or to add new teams by clicking on "+".
5. Tasks
Shows the number of tasks that are connected to the incident. By clicking on the number, you will see a list of all tasks. You can click on the tasks to mark them as completed. If you need to add more tasks, click on the "write" symbol.
The outline around the task icon shows the status of the tasks.
-
Orange - Task pending / incomplete
-
Red - Task deadline is overdue
-
Green - Task is completed
On the case of the image above, there are a total of 4 tasks on the incident. 2 tasks are pending/incomplete, 1 task is overdue, and 1 task is completed.
The availability of tasks on incidents depends on what Logit license your company has bought. All users can use the incidents module but using tasks in incidents is an extra feature.
6. Affected persons
If the incidents affect specific persons, injured persons, missing persons, etc., you can add the persons here. You will be asked for the name of the person as well as some "identifying traits", to describe the person or his state. You can also set the status of each affected person. You will need to "Check out" all affected persons to be able to close the incident.
7. Actions
Click this icon when you need to edit the incident to change the severity level. This is also where you can close the incident. This will move the incident from the section of the Active incidents to the section for closed incidents.
CHANGE THE VIEWING ORDER OF THE INCIDENTS
The active incidents are sorted by their status/severity level. If you click on "Order by status", you can choose other ways of ordering the incidents.
ADDING CONTENT TO THE INCIDENTS FEED
The active incidents are also listed on the left side of the log. By clicking any of these incidents, the log will show the log for that specific incident. If you need to communicate or log on the incident, will first have to select the incident in the left bar, and then add the log entry or image. You can easily switch between the different logs or communicate feeds. To switch back to the main log, click on the home/house icon. This is a combined feed of everything that goes on across all incidents.
CLOSE AN INCIDENT
When an incident has managed properly, you can click on the "action" icon on the incidents card. Choose "Close incident". This will move the incident from Active incidents to Closed incidents. If there have registered any affected persons on the incident, you will be asked to "Check out" all affected persons to be able to close the incident.
After the incidents has been closed you can download a report (Incident Reports) for documentation and evaluation of how you managed the incident.